Containerize your app with no Dockerfile. Meet Buildpacks.
Containerize your app with no Dockerfile. Meet Buildpacks.


When we start learning about Docker, one of the core concepts that we learn is the concept of a Dockerfile: a text document that contains all the commands a user could call on the command line to assemble an image.
That requires a little of extra knowledge, effort and time to create this file and specify the right commands to build our app so that we can run it afterwards as a container.
Now imagine that there was something that was responsible for generating that Dockerfile for you, and all that happening behind the scenes. Wouldn't it be great?
The first time I heard about this concept was a few weeks ago when trying out OpenShift: Source-to-image (S2I), a framework that makes it easy to write images that take application source code as an input and produce a new image that runs the assembled application as output.
But what if you are not using OpenShift? Well, I came across a this tweet from @ahmetb, Engineer at Google:
We created a continuous delivery experience for Cloud Run:
— ahmet alp balkan (@ahmetb) August 18, 2020
Choose your GitHub repos directly from the UI, it will be built and deployed automatically. pic.twitter.com/S67T7A4cYL
I was amazed of the concept behind it: a tool that inspects your app source code and builds it without requiring a Dockerfile.
 GoogleCloudPlatform
Let's get our hands dirty and dive into the how-to.
Creating an ASP.NET Core Web API
For the sake of simplicity, we're going to create an ASP.NET Core WebAPI using the dotnet CLI. However, if you're looking for a Go, NodeJS, Java or Python example, have a look at the samples here.
$> dotnet new webapi
The template "ASP.NET Core Web API" was created successfully.

Processing post-creation actions...
Running 'dotnet restore' on C:\src\my-dotnet-console-app\my-dotnet-console-app.csproj...
  Determining projects to restore...
  Restored C:\src\my-dotnet-console-app\my-dotnet-console-app.csproj (in 162 ms).

Restore succeeded.
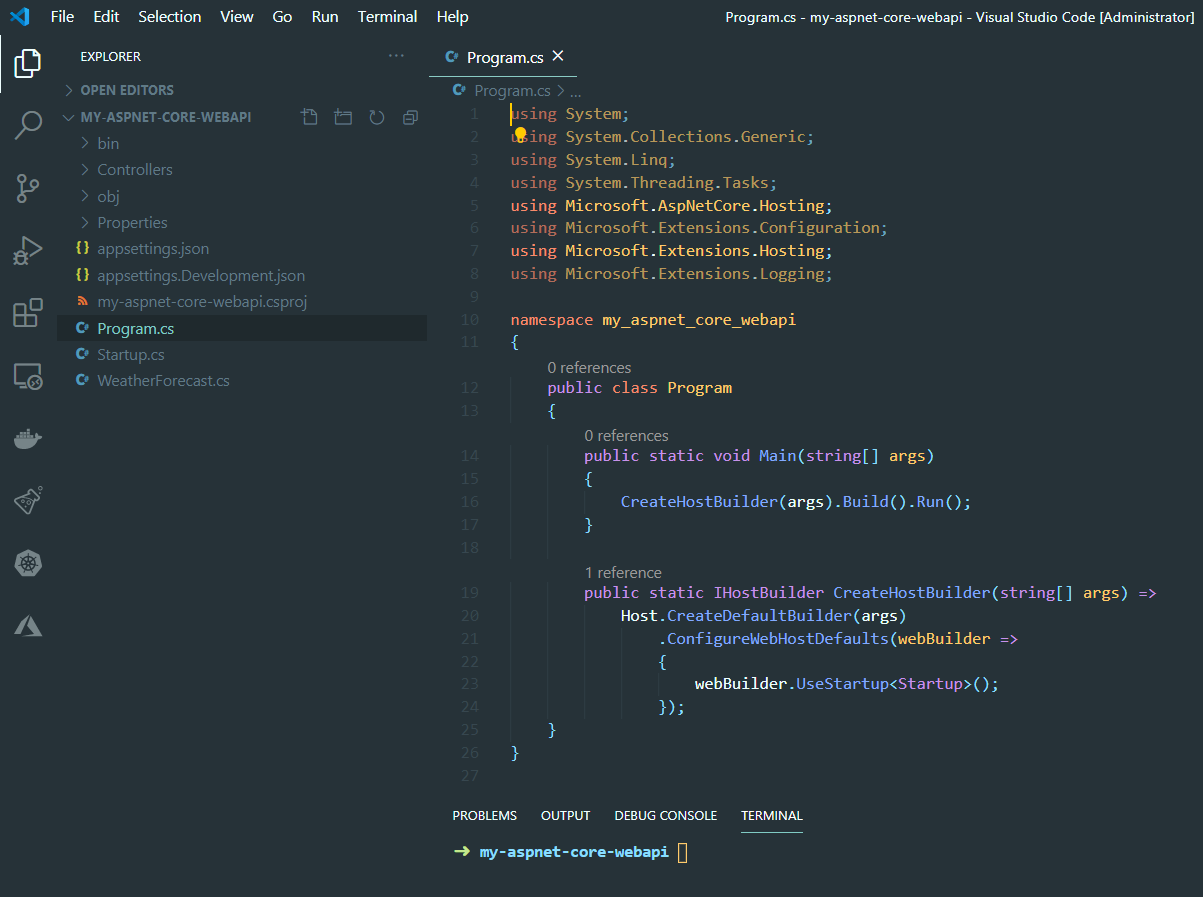
Now, let's modify the code of the Program.cs file to specify the port the API will be listening to.
Add the following lines so that the API will listen to the port specified in the env. variable PORT. If no value is specified, default to 8080.
public static IHostBuilder CreateHostBuilder(string[] args)
{
    string port = Environment.GetEnvironmentVariable("PORT") ?? "8080";
    string url = String.Concat("http://0.0.0.0:", port);

    return Host.CreateDefaultBuilder(args)
            .ConfigureWebHostDefaults(webBuilder =>
            {
                webBuilder.UseStartup<Startup>().UseUrls(url);
            });
}
Building your project with Docker
Usually, when you want to build your app source code with Docker, you have to define a Dockerfile that includes all the steps needed to build your app successfully.
Below you can see an example of Dockerfile to build and run an ASP.NET Core WebAPI:
FROM mcr.microsoft.com/dotnet/core/sdk:3.1 AS build-env
WORKDIR /app

# Copy csproj and restore as distinct layers
COPY *.csproj ./
RUN dotnet restore

# Copy everything else and build
COPY . ./
RUN dotnet publish -c Release -o out

# Build runtime image
FROM mcr.microsoft.com/dotnet/core/aspnet:3.1
WORKDIR /app
COPY --from=build-env /app/out .
ENTRYPOINT ["dotnet", "aspnetapp.dll"]However, this time, we are going to skip this step and we are not going to create a Dockerfile. Instead, we are going to use buildpacks to build our app source code for us without requiring a Dockerfile.
Using buildpacks to build our project
My local installation of Docker consists of Docker for Desktop and WSL2 (Windows Subsystem for Linux 2) so, I'll proceed with the pack installation for Linux. If you're using other OS, you can find out how to install pack here:

pack is available on GitHub releases so I can directly get and install it:
wget https://github.com/buildpacks/pack/releases/download/v0.13.0/pack-v0.13.0-linux.tgz
tar xvf pack-v0.13.0-linux.tgz
rm pack-v0.13.0-linux.tgz
./pack --help

# Move the executable to a directory like /usr/local/bin or add the current directory to your PATH.
sudo mv pack /usr/local/bin
Once pack has been installed, we can invoke it to apply the general builder to build the application in the current directory, and then containerizes the result into a local container image named my-api.
pack build my-api --builder gcr.io/buildpacks/builder:v1
Upon completion this command would have generated a Docker image with name my-api. Now, let's create a container that runs the API locally on port 5000 and let's expose it to port 8080:
docker run --rm -it -e PORT=5000 -p 8080:5000 my-api

info: Microsoft.Hosting.Lifetime[0]
      Now listening on: http://0.0.0.0:5000
info: Microsoft.Hosting.Lifetime[0]
      Application started. Press Ctrl+C to shut down.
info: Microsoft.Hosting.Lifetime[0]
      Hosting environment: Production
info: Microsoft.Hosting.Lifetime[0]
      Content root path: /workspace
warn: Microsoft.AspNetCore.HttpsPolicy.HttpsRedirectionMiddleware[3]
      Failed to determine the https port for redirect.
Then you can access your API at http://localhost:8080
curl http://localhost:8080/weatherforecast

[{"date":"2020-08-20T14:43:41.2360835+00:00","temperatureC":46,"temperatureF":114,"summary":"Warm"},{"date":"2020-08-21T14:43:41.2360938+00:00","temperatureC":33,"temperatureF":91,"summary":"Balmy"},{"date":"2020-08-22T14:43:41.2361006+00:00","temperatureC":44,"temperatureF":111,"summary":"Sweltering"},{"date":"2020-08-23T14:43:41.2361072+00:00","temperatureC":-16,"temperatureF":4,"summary":"Cool"},{"date":"2020-08-24T14:43:41.2361138+00:00","temperatureC":42,"temperatureF":107,"summary":"Warm"}]%
Conclusion
This has been a simple scenario to demonstrate how easily you can build your ASP.NET Core API and have it running as a container without having to create your own Dockerfile.
However, your app could require additional dependencies to be built successfully and therefore you'll have to extend the build image to include those dependencies and/or your app could require additional packages to be installed and available when it runs, in that case, you'll have to extend the run image.